I’ve been having so much fun with an inexpensive photography gadget recently and I thought I’d share it with you.
There are 3 key words in that sentence above. And anytime I can use them together in the same sentence, it’s usually a very good thing and brings me joy. Those would be photography, inexpensive and fun.
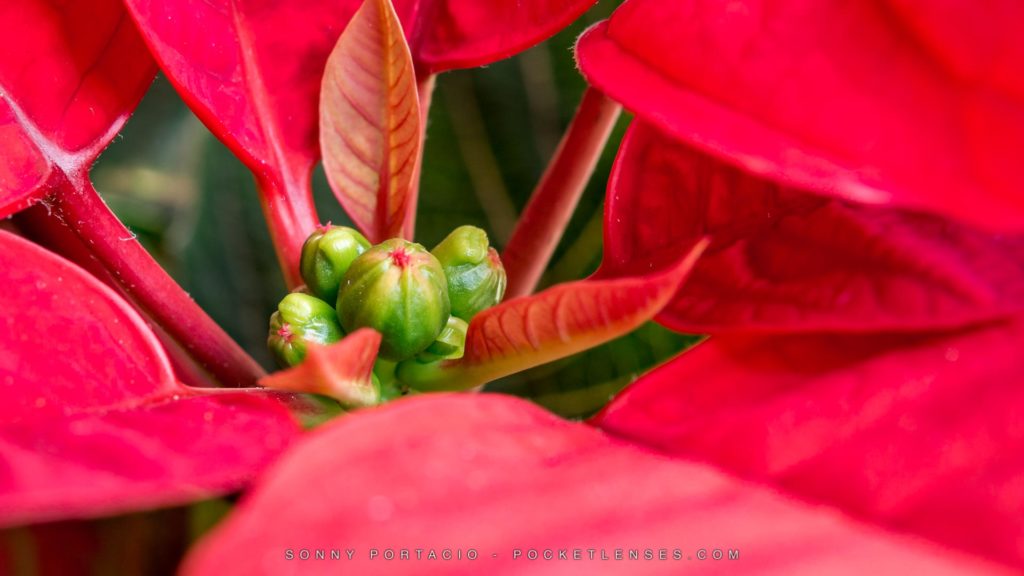
If you’ve never tried Macro photography before, you should give it a go. It opens up a whole new world of seeing both for you and your viewers. Getting up close to interesting objects with nice detail is something that many of us don’t see on an everyday basis and therefore a well crafted macro image is naturally remarkable and notable. There’s something about a close-up macro photo that appeals to many people. A close-up, macro photo has the advantage of instantly removing unwanted distractions (a common problem with snapshot images). It’s as if the photographer is pointing out something important and significant in the image, and the viewer as a participant, is encouraged to look deeper so that too can see what the photographer found so poignant and interesting.
The trouble is, macro photography can quickly get expensive and quickly cross over to “not fun” for many people.
First a disclaimer, this is NOT a tutorial on how to create the the sharpest, flawless, technically perfect macro images. For that you’ll need to drop a lot more cash and hone your skills. I’ve owned some really nice “genuine” macro lenses of impeccable quality that have produce great results. The thing is, the quest for the perfect macro shot can cost you. You realize the you could improve the lighting so you spend on lighting gear specifically for macro photography. Then you hear that you can better fine tune your focus if you use a rail. You’ve also heard about focus stacking and how that might help with your depth of field … on and on.
Although these tactics may be true, they are not inexpensive AND since they are not very mobile, they can start to detract from the “fun” factor.
SO, if you’d like to learn more about my inexpensive and fun gadget read on.
The device is often called the humble “Close Up Filter” or “Macro Filter”. I’m not sure that’s a fitting name, but here’s what it is. It’s a piece of glass, like a magnifying glass, that screws on to the front of your lens. Because it screws on to the front of your lens like an ND, polarizing or color filter, it’s often called a filter. And it’s not really a lens in the way we often think of lenses: a barrel like thing that has many optical lens elements built in. This is a very simple magnifying glass that screws onto the front of your lens. They come in different strengths or magnifications and because there’s not much to them, they are light, nimble, portable and fun (and typically inexpensive).
(You knew I was going to get there, right?)
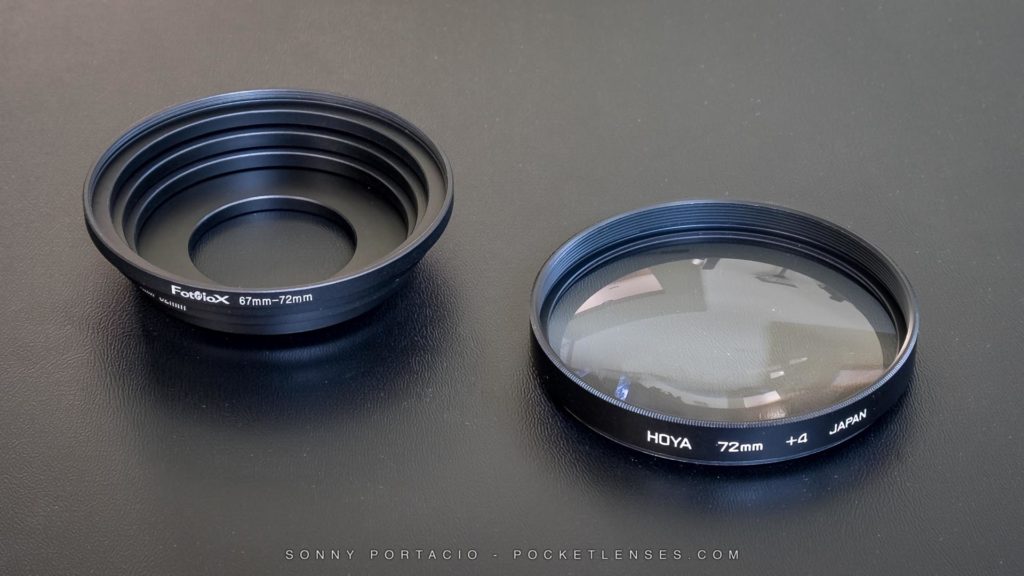
So here’s how I roll and how I’ve been shooting lately with this gadget. I’ve been having a blast carrying around my lightweight gear. The moment I see a subject that might benefit from a little bit of the ol’ macro crafting, then I screw on the Close Up filter and BOOM, fun happens! This little device has opened up a whole world / genre of photography in a small, lightweight and inexpensive package. Once again, for pixel peepers, this little gadget is NOT equivalent to a dedicated macro lens. Will you find some edge to edge softness, maybe some distortion and some chromatic aberration? Maybe, but it won’t be bulky or cost you much either. Besides not all great photography has to be edge to edge sharp of free of distortion. Look at the kind of fun that people intentionally craft with a Lens Baby lens or the purposeful “light leaks” or flares that people put in their images.
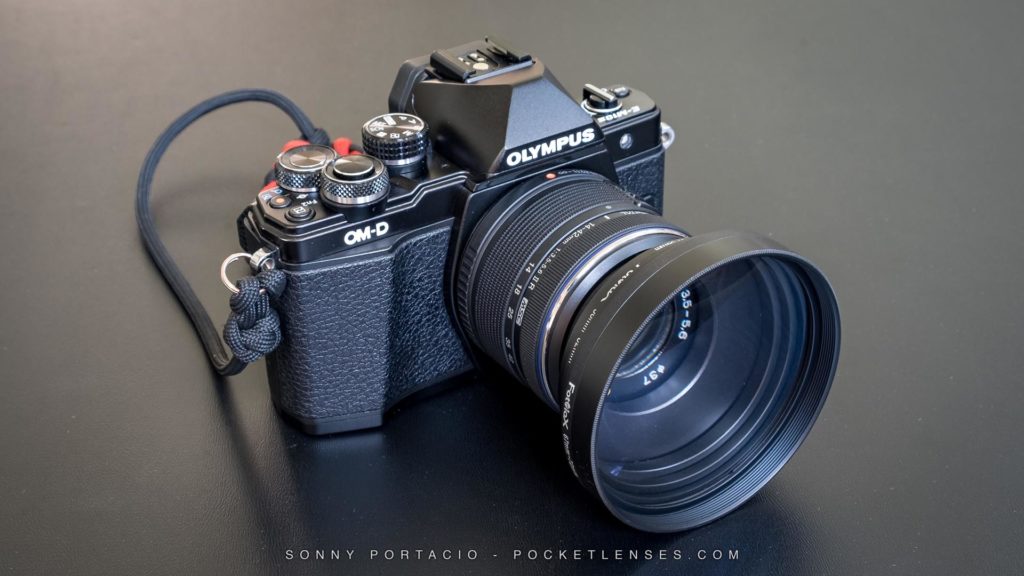
Here are a few tips for you if you’re going to dive into this.
I use “step down” rings so that I can use the macro filters on more than one lens. Step down rings are a great inexpensive tool that you should have anyhow if you use filters.
Although you can hand hold your shots, you might consider a tripod. Here’s why: By it’s nature, shooting images very close to your subject really narrows the depth of field. This means that if you have your aperture set to a low f-stop (like f2.8 or f3.5) only a very small part of your image will be in focus. Everything else will quickly be out of focus in the shot. (and that’s ok if it’s the look you’re going for). So, if you want more of the image in focus, you can close your aperture to a setting like f8 or f11 or f18. Once you do this, you’ll need to change either your shutter speed and / or your ISO to compensate and keep your exposure correct. For me, I like to keep my ISO as low as I can (100 or 200) THEREFORE, I’ll usually need a longer shutter speed to compensate. Longer shutter speeds often introduce blur if you’re hand holding the camera so that is the reason for a tripod. Here’s how I usually set up my shot.
I’ll see the subject and then handhold my camera to figure out the composition and distance that I plan to shoot from. THEN and only then do I setup my tripod (putting the head approximately where my camera was) and lock everything down. I set my ISO to 200, my f-stop to f8 and my shutter speed to whatever it needs to be to expose properly. I set a 2 second timer, check my composition one last time, then push the shutter release button.
Here are a few links if you’d like to check out the kind of gear I’m referring to.
Close Up Filters Examples (these are NOT my filters, but similar)
https://www.amazon.com/dp/B00WV002GE
https://www.amazon.com/dp/B004E580PY
https://www.amazon.com/dp/B002WOP57U
Step Down Rings
https://www.amazon.com/dp/B001G45VTE
Tripod
I often use the Joby Gorillapod SLR-Zoom https://www.amazon.com/dp/B002FGTWOC/ and here’s why: It’s gets low and close to many macro subject and it’s easy to manipulate and make adjustments. I use a full standing tripod if needed. They do give you more adaptable options, but realize it does come at the cost of weight and bulk.
I hope this gave you some helpful information and inspired you to give inexpensive macro photography a try.
Do you ever shoot Macro photography? Do you have any tips or insights you can share? If so, please leave your thoughts or questions in the comments below.
Some of the links above are affiliate links, which means that if you choose to make a purchase, I will earn a commission. This commission comes at no additional cost to you. You should know that I have experience these products and recommend them because I have found them useful and believe that they’re valuable tools that can help you improve your images and photography experience. The affiliate commission will help support this site and all of my efforts to bring you timely, valuable photography goodness, and I sincerely thank you.


No comments yet.