Exposure Compensation
Sounds complicated? It really isn’t. MANY cameras have this feature, you just may not know about it.
Exposure Compensation is a way in which you setup your camera to intentionally make the image brighter or darker. Why would you want to do this?
 If you set your camera on full-auto, the camera is making it’s best guess as to how dark or light to make the image. The problem is, sometimes the conditions might fool your camera. Here are a couple situation where your camera might be fooled.
Bright white background such as snow or when your subject stands with a bright window behind them can “fool” your camera. Your camera knows that there is a certain amount of light coming into the sensor and will adjust accordingly. If you were taking a picture of your kids in a green, grass pasture it would try to make the overall scene “medium” lit. The grass would come out “medium” level of lightness. Okay, no problem there. But what if you tried to take a picture of the same kids on a bright, white snow field? The camera has no idea that it’s snow. It just knows that there is a LOT of light coming into the sensor and it adjusts accordingly and makes the scene darker to bring it to “medium” level. It brings down the snow to a nice grayish color. The problem is that your kids, who are really the subject of the picture (not the snow) are now very dark. You could try to use the flash to lighten their faces, but if your flash isn’t powerful enough or if you’re too far away from your kids, it may not make enough of a difference.
If you don’t care that much about the detail in the snow (let’s say there wasn’t much interesting in the white fluffy stuff this time anyhow) and you don’t mind “blowing it out” to an almost pure white, you can adjust the settings (again NOT in full-auto mode) so that your kids faces come out right and well lit.
Most cameras will allow you to adjust the exposure. This is known as Exposure Compensation. If your camera is being fooled (and that can happen more times than we’d like) then you’ll need to take control and make some adjustments to get the picture looking the way it should. The really nice thing about digital cameras (as opposed to ancient film cameras) is that you can immediately see if you got the exposure right and don’t have to wait to develop the film!
Take a shot and if it’s exposed wrong, make an adjustment and take another shot. After a bit of practice you’ll start to learn when you’ll likely need to make the adjustment even before you take that first shot.
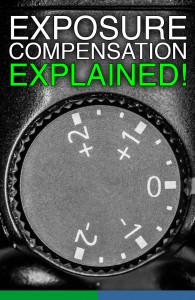
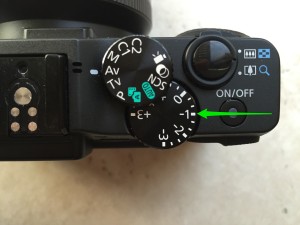
Check your owners manual for “Exposure Compensation” and how to change it. You probably can’t do this if you’re set to full-aut0 mode though. Some cameras use a dial and some require you to go into a “menu” and make the adjustment there. What you’ll be looking for is a symbol that looks something like this:
To “add” more light to your picture and make it brighter, dial up your adjustment with a +1 or +2. This will make the picture brighter and works well with snow backgrounds or backlit subjects. The bright parts will get brighter, but so will the dark shaded areas and this is exactly what you’ll want to do if the faces are coming out a bit too dark (and you can’t fix it with a flash).
Take a look at the image examples below.
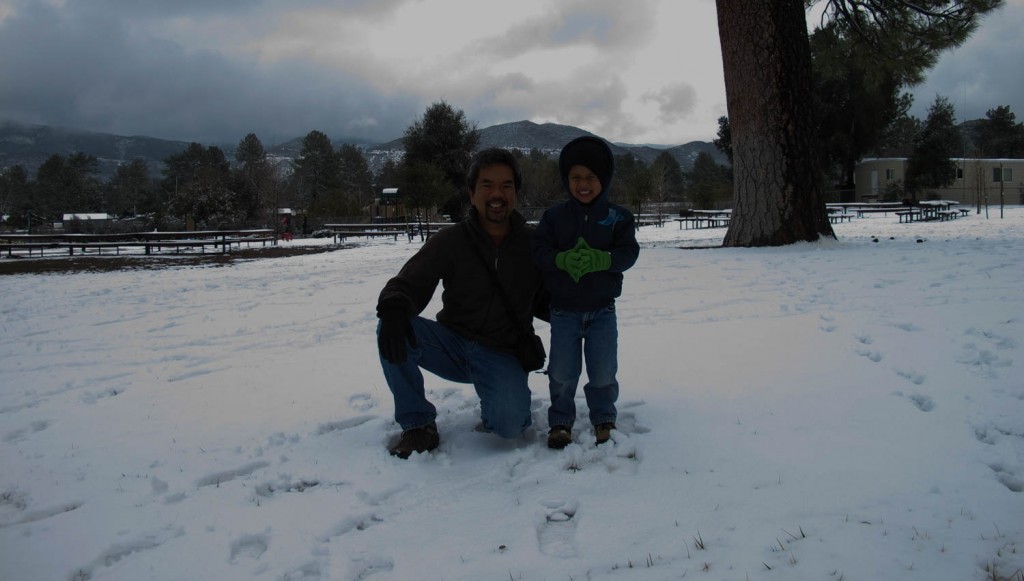
Shot with the camera on full-auto. The camera thinks I want the detail in the snow and makes the image dark enough to see it.
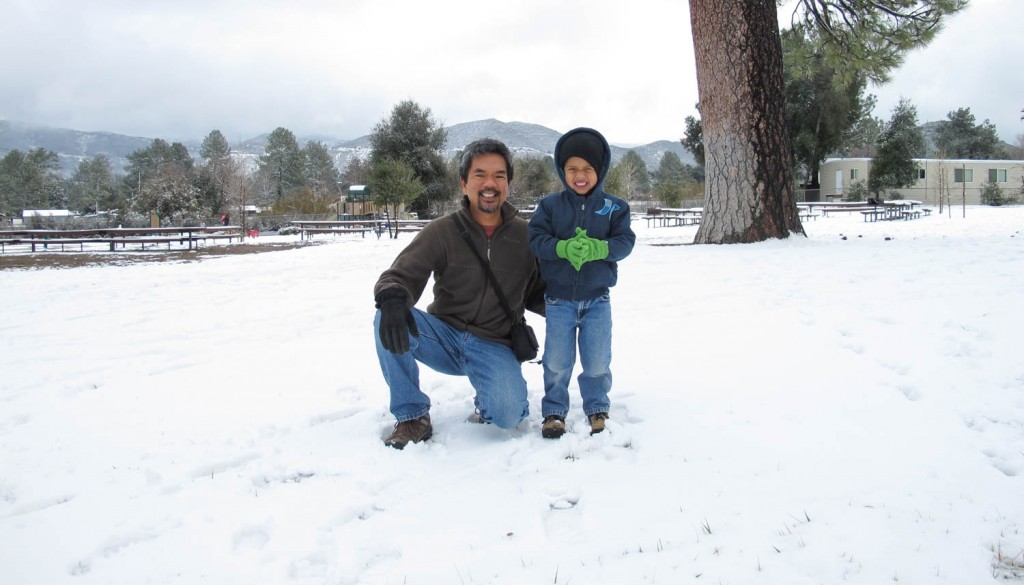
Here we adjust the Exposure Compensation +1.5.
In the first picture, the camera tries to make the scene “medium lit” and “normal” and actually if you took the people OUT of the picture, the background is nicely exposed so you can see the clouds and other detail. The problem is, there ARE people in the picture and they should be properly lit. So to compensate, I dialed up the Exposure Compensation to +1.5, and although it overexposed for the snow (it’s now bright) the faces look good and properly exposed. No flash, just a couple clicks on my camera.
Addendum: June 30, 2015:
What if a picture is blown out and too light?
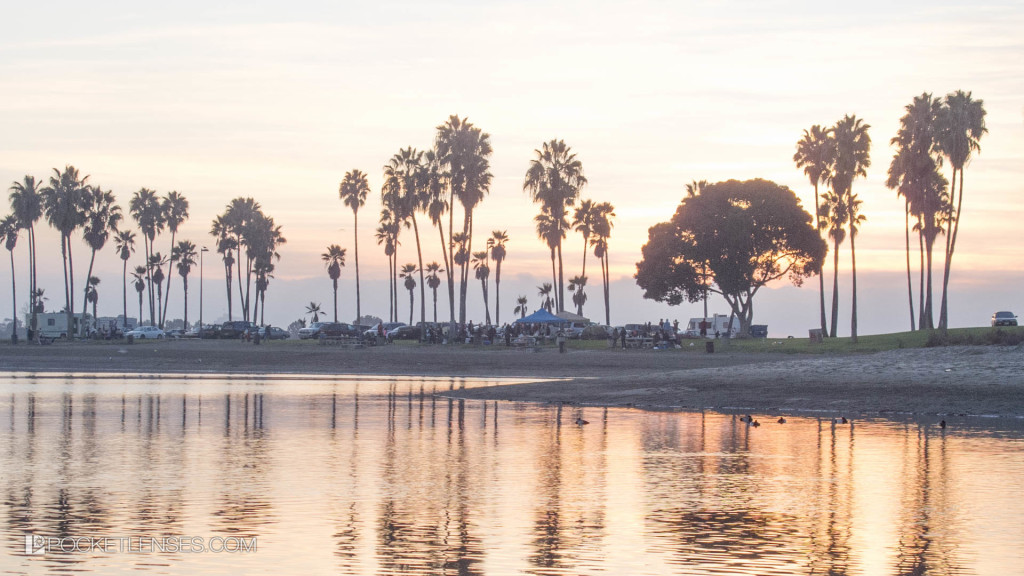
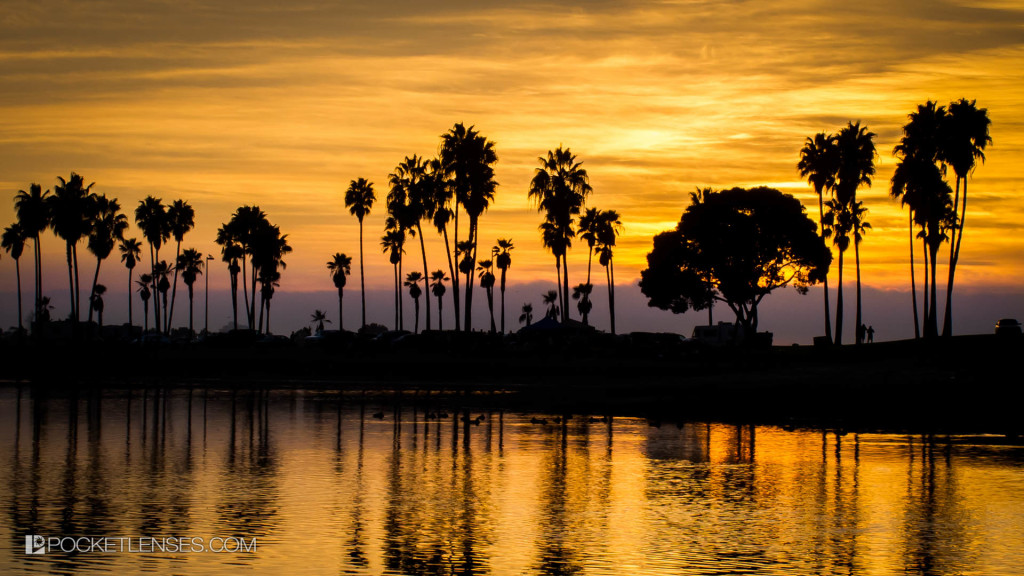
In the above example, the camera “decided” that what was important was the cars and people in the center of the image. In order to see them, it brightened the entire image and by doing so, washed out the beautiful sky. This was NOT the image that I had envisioned so … I removed some of the “brightness” (-1) and brought down the overall exposure.
Using the Exposure Compensation adjustment of -1, resulted in the image I really wanted to create (below):
Learn how to change the Exposure Compensation on your camera and some fundamentals of what makes a great image and you’re well on your way to getting some great pictures!
ASSIGNMENT;
Get out there and take some pictures of scenes
Set your mode to either Aperture Priority or Shutter Speed Priority.
Make your exposure compensation adjustments and notice the difference in your images.
Note that as you increase or decrease your exposure, that different parts of your image will come into proper exposure.



Hi Sonny,
I am really struggling with taking quality close up photos of small objects. I want really good photos for selling small products on EBAY however I find it difficult to get the clarity necessary so that buyers can fully appreciate the goods on offer. I guess this is another type of exposure compensation problem so perhaps you would consider writing an article to help with this issue? Anyone else got this problem?
Thanks
Cool! I’ve always wondered what those +1 and -1 numbers meant. This is helpful. I’m going to go out and try this to see if it does what I think it’s supposed to. Thanks!
You’re most welcome! I’ve gotten the question several times about the +1, -1, etc. symbols. Knowing how to adjust exposure compensation can really help to get the right part of the picture exposed the way you want.