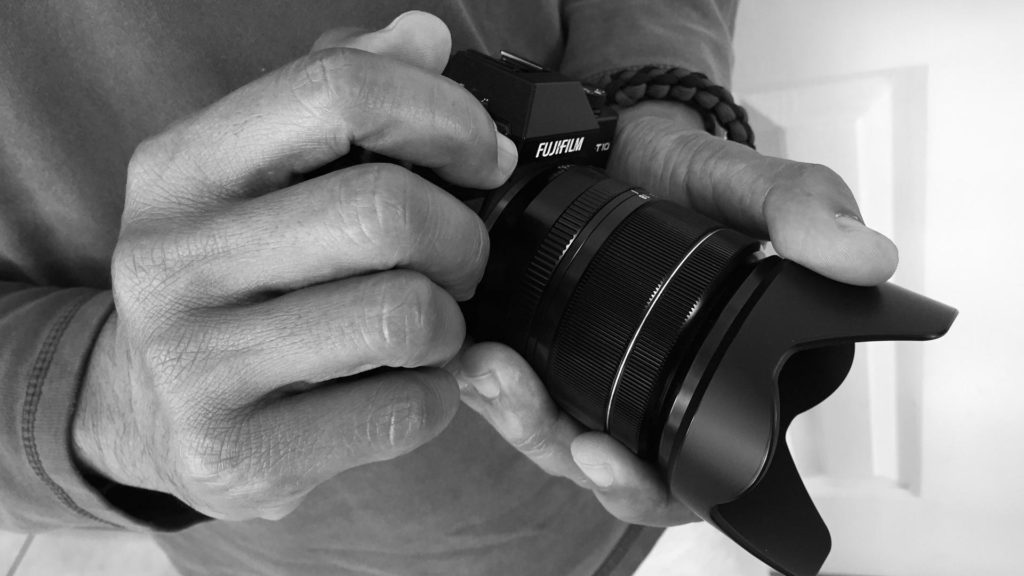
I’m going to share with you a simple technique to improve your photos. I said simple, but it’s a practice that is easier said than done. Here it is:
Train yourself to have steady hands. That’s it!
The steadier your hands, the higher rate of sharper pictures you’ll create.
You can have the perfect lighting and the perfect subject and the perfect composition, but if your hands are shaky and your image is unintentionally soft and blurry, you will have missed the perfect opportunity.

Some people have steadier hands than others. The good news? You can learn how to do this. You can practice and get better.
Why is it that some people shoot with shaky hands? I really think it’s because people get lazy. They’re in a hurry to take the picture or they’re focusing on other aspects of the capture process. They rely too much on the camera to do all the work to get a sharp image. Frankly, I think most people aren’t thinking about steady hands but here’s a little bit of encouragement for you. Neither do I anymore.
I say anymore because, I used to think about it all the time. I used to think about it and practice and practice and now. It’s just something I do. For those of you who drive a car or ride a bike, it’s like this: When you first started your brain was overstimulated thinking about all the things it took to make it go and not crash. A lot of purposeful, mechanical muscle training. Once you’ve practiced again and again you’re no longer intentionally thinking about pedalling, or shifting, or activating the turn signal, or checking your mirrors or leaning into a curve. You just do it and your brain is more engaged with the important things, where are you going, what’s in front of you on the road, where can you park. This is EXACTLY how it is with photography!
Get out there and practice this one new thing until it’s just part of how you take pictures. It takes practice to transform it from something that is intentional to something that you do subconsciously, but you’ll get there.
Here’s some good news. It doesn’t cost you anything. It’s cheaper than any gear. It’s an effective way to improve your photos and make them sharper and using these techniques certainly won’t hurt your images. As I’ve said this is a GREAT technique to have as an automatic part of your photo taking toolkit and habits.
Sure, fast shutter speeds help, flashes and strobe help, but this always helps or again, doesn’t hurt.
Even with panning or moving with your subject while shooting, it can still help to know some fundamentals.
It’s kinda like shooting a gun or rifle WELL. Consistently well, not just an occasional accident: It takes practice.
Steady hands helps get the most out of your lenses. Helps make the images coming out of mediocre lenses better and well designed lenses, great!

Let’s go over some basics:
Start from the bottom up.
Get a good stable platform. I like to keep my feet in a V shaped, or perpendicular to each other footing.
Keep your elbows close in to your body. Squeeze your ribcage a bit with your elbows if you can.
Brace yourself and your camera if you can. Use a pole or a tree or a wall. I’ve shown you how to use the glass of an animal enclosure on video I created. For macro shots, I’ve knelt down and used my knee to stabilize. Get in the habit of thinking and looking for ways to steady your shot. This is probably the biggest point of awareness to learn. Use a monopod for certain situations, they can be really helpful to stabilize you.
I like using the eyepiece of my camera. It’s one more point of contact and stability. I prefer not to use the back LCD if I can avoid it. Sometimes I can’t if I’m shooting from high or low, but I’ll use the eyepiece as my first choice, not only for immersion but also for stability.
Slowly let your breath out or hold it. I tend to hold mine. I’ve caught myself holding my breath when I shoot videos. Not a good thing if the video recording is 5 minutes long. I’ll smile and start breathing of course, but realized just how ingrained and automatic it has become with me.
Next squeeze, don’t press the shutter button. There’s a difference, you know. I’ve seen people press the shutter button quickly, with a jerk, as though it will help you capture a fast moving object, as though it will somehow change the shutter speed by pressing faster.
Here’s a pro tip for you: I’ve learned, and have gotten into the habit of, rolling my finger onto to the button. I roll it off the surrounding button ridge and onto the button. If you were to watch my finger, it would be an almost imperceptible movement. My finger sits on that ridge. The edge is about in the middle of my fingertip. I then roll my finger towards me and gently squeeze that button. Again, this is automatic now, even when I’m shooting fast moving objects, it’s an almost imperceptible roll instead of a perceptible push.
Alright, I hope that helps you with some tips on how to get clearer, sharper pictures, using a technique that is free and effective.


No comments yet.